For your convenience and safety we provide the option to enable Anti-SPAM protection for any mailbox that you have with us.
This is an automatic protection based on multiple criteria, which can filter all incoming mail and protect your email account(s) from different types of SPAM (including virus-infected mail attachments).
There are 3 options to activate the Anti-SPAM Protection option for a certain mailbox:
OPTION 1: Enable Anti-SPAM Protection for several email accounts.
Go to the Email Manager menu in your Control Panel (Email > Mailboxes tab).
There you will see a list of all existing email accounts.
You can select each of these email accounts (put a check mark in front of it). Above the list of mailboxes, there are rows with identical buttons – the second one is the Anti-SPAM button.
OPTION 2: Using the icon located in Actions column. If you want to enable the Anti-Spam option for certain mail you must click on the red icon. Once the option is enable, the icon will be green.
Once you select the desired email account(s) and click on the Anti-SPAM button, you will be forwarded to a page where you will be able to select the level of protection and choose between two SPAM message options – to delete or to forward them to an e-mail address specified by you.
IMPORTANT: The higher the level of protection you choose, the better the chance of rejecting a valid e-mail message that you actually wish to receive will be.
It is recommended that you start off with a lower level or use the option to redirect the SPAM messages so that you can review them manually.
OPTION 3: Go to Mailboxes > Spam section of your Contron Panel and click on the “Activate SPAM Protection” button. From this section, you can activate and control the Anti-spam protection levels for your email accounts.
Name servers play a critical role in directing your domain to the correct hosting server. If you want to use custom or private name servers for a domain registered with SharkASP, you can easily configure them through the SharkASP Control Panel.
There are two ways to register a new Name Server (NS) record for a domain registered with SharkASP:
Option 1: Using the Edit Name Servers/WHOIS Column
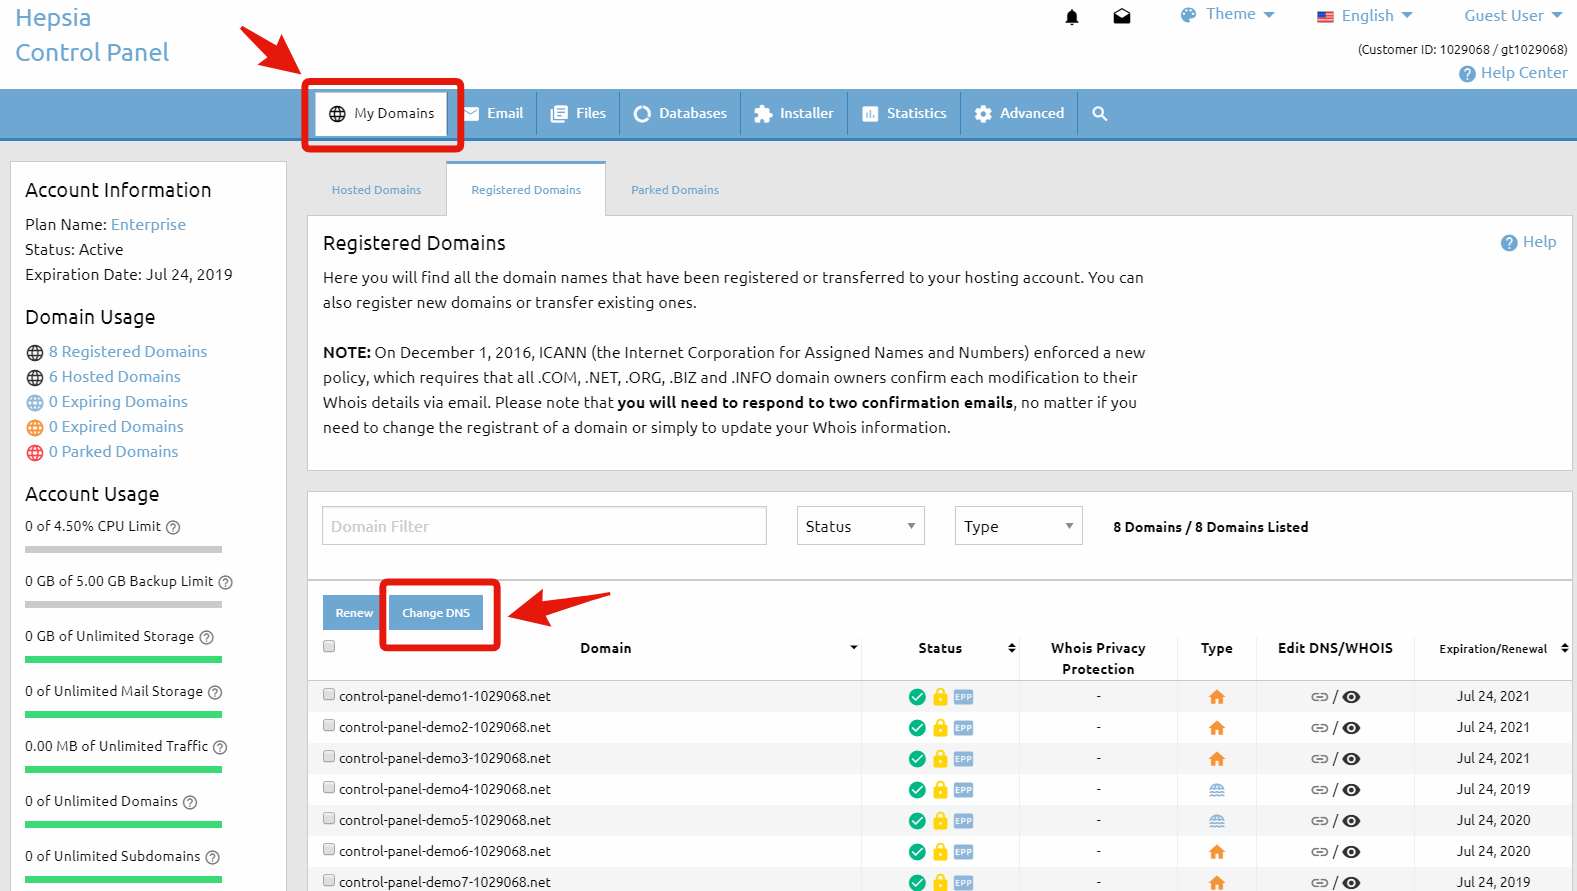
Log in to your SharkASP Control Panel and navigate to My Domains > Registered Domains.
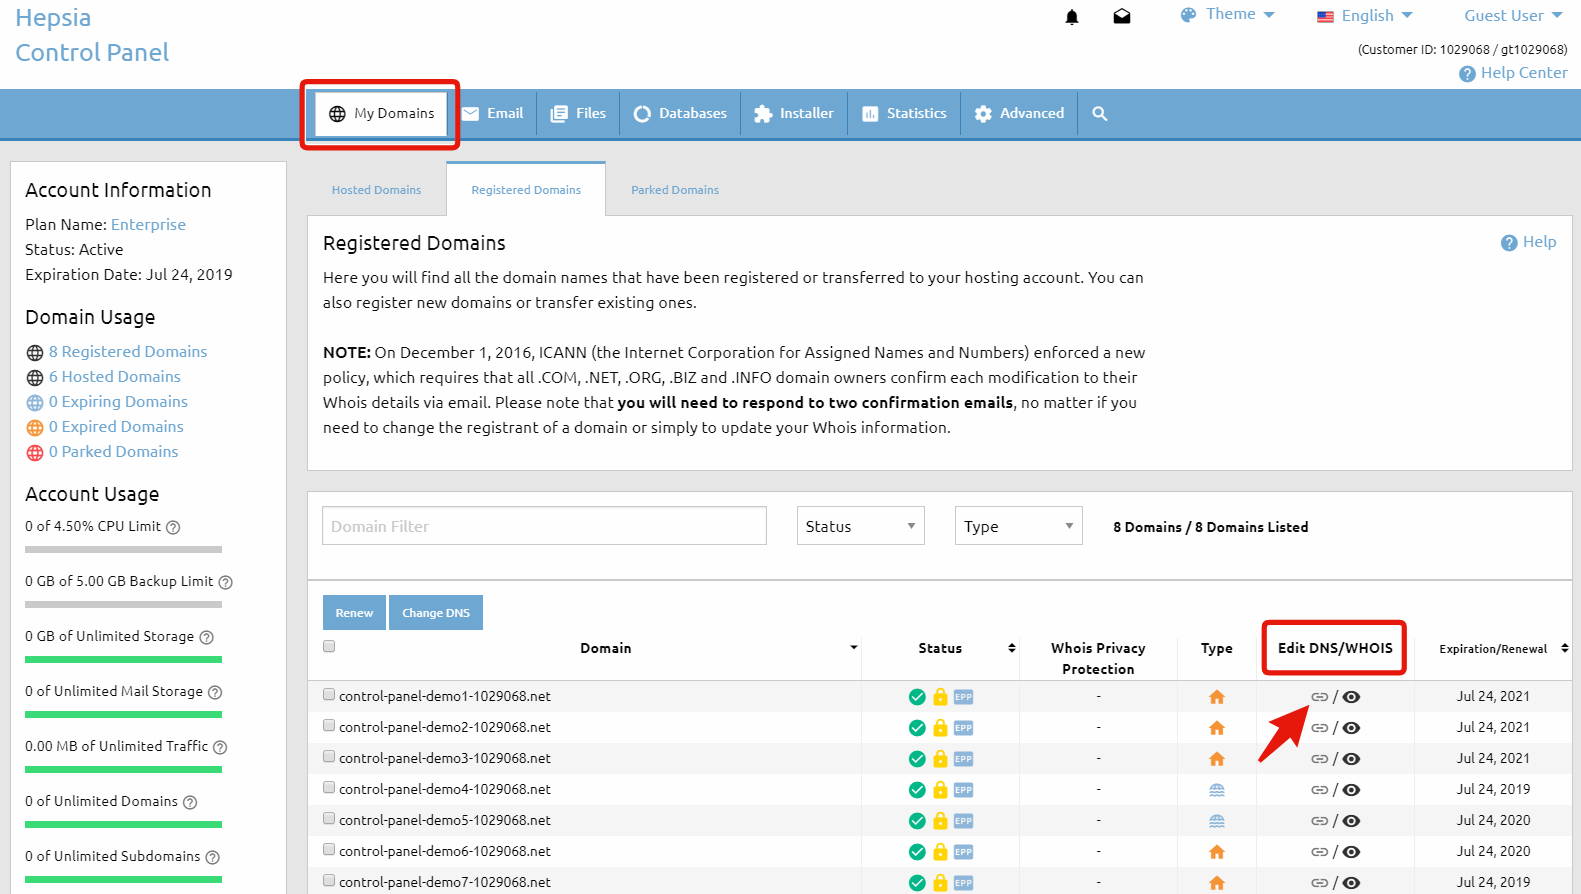
Locate the domain you want to update and find the Edit Name Servers/WHOIS column.
Click the Edit Name Servers icon.
The Manage DNS pop-up window will appear. Switch to the second tab labeled Manage Domain-Based NS.
Enter the name server (NS) and corresponding IP address in the required fields.
Click the Register button to save the new name server record.
Option 2: Using the Domain Information Window
Sign in to your SharkASP Control Panel and go to My Domains > Registered Domains.
In the Domain column, click the domain name you wish to modify.
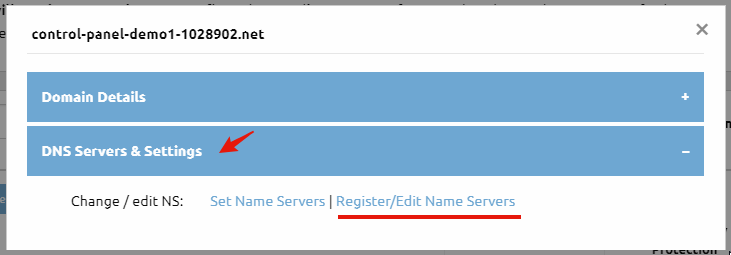
The Domain Information pop-up window will open. Go to the DNS Servers & Settings tab and click Register/Edit Name Servers.
In the Manage Domain-Based NS tab of the Manage DNS window, enter the name server and IP address details.
Click Register to add the new name server record.
Important Notes
Name server changes may take up to 24 hours to fully propagate across the internet.
You can register multiple name server records for redundancy and improved reliability.
To change the name servers of a domain name, you need to access the registrar where the domain is currently registered.
If your domain name is registered with SharkASP, you can easily update its name servers through the Domain Manager in your SharkASP Control Panel (My Domains > Registered Domains). There are three different ways to do this:
Option 1: Change Name Servers in Bulk
Each domain name in the list has a checkbox next to it. Select one or more domains by ticking the checkboxes, then click the Change DNS button.
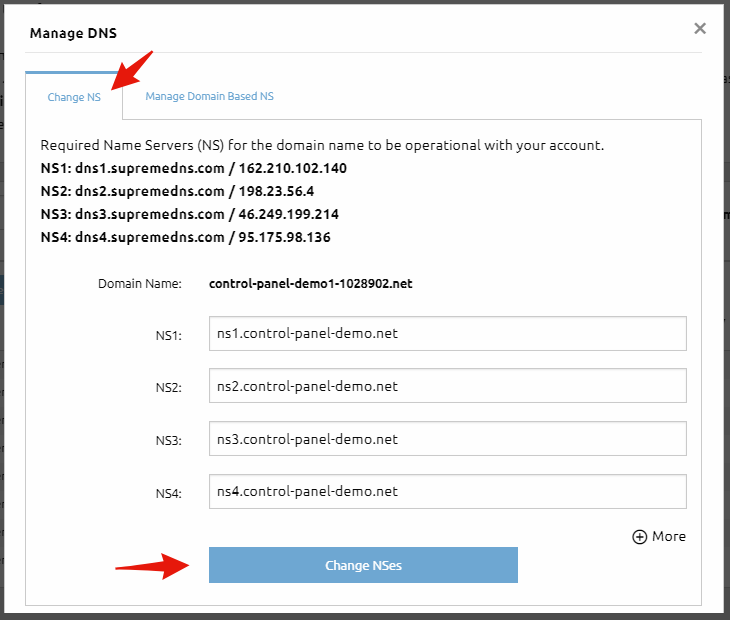
You will be redirected to a page where you can enter the new name server values. Once you’ve entered the details, click the Change NSes button to save your changes.
Important: This option allows you to update name servers for multiple domain names at the same time.
Option 2: Edit via the DNS/WHOIS Column
Next to each domain name, you’ll see several icons grouped into different columns. Locate the Edit DNS/WHOIS column and click the NS Status icon (the icon indicated by the arrow in the reference image).
A small pop-up window will appear with two options:
Edit the name server settings
Register your own private name servers
If you select Edit the name server settings, you’ll be redirected to the same page used in Option 1, where you can enter the new name servers.
After entering the new values, click Change NSes to apply the changes.
In the Domain column, click the domain name you want to modify.
This will open the Domain Information pop-up window showing details for the selected domain. Navigate to the DNS Servers & Settings tab and click the Register/Edit Name Servers link.
In the Change NS tab of the Manage DNS window, enter your new name server information and click Change NSes to save the changes.
Important Note: Name server updates may take up to 24 hours to fully propagate across the internet.
Why Choose SharkASP for Domains and Hosting?
With SharkASP, you get more than just a domain name—you get a powerful, reliable hosting platform designed for ease of use and performance. With SharkASP, you can:
Register and manage all your domains from one control panel
Update DNS settings and name servers quickly and easily
Host your websites on secure, high-performance servers
Access 24/7 support from experienced hosting professionals
Whether you’re launching your first website or managing multiple domains, SharkASP provides the tools, flexibility, and support you need to manage your domains with confidence.
In addition to web hosting services, SharkASP also provides domain registration. To access the WHOIS data sheet for a domain registered with us, follow the steps below:
Log in to your control panel and navigate to My Domains → Registered Domains.
In the “Domain” column, click on the domain name you want to review.
This will open the “Domain Information” pop-up window, which displays detailed information about the selected domain.
Within the “Domain Details” section, locate the “Edit WHOIS Details” option.
Click the “View” link to review the domain’s current WHOIS information.
Regularly reviewing your domain’s WHOIS information ensures accuracy and helps maintain full control over your domain registration. To register a domain name, please visit https://sharkasp.com/domain